Using Alerts: Difference between revisions
No edit summary |
No edit summary |
||
| (15 intermediate revisions by 2 users not shown) | |||
| Line 1: | Line 1: | ||
Alert is a visual or/audio/e-mail notification triggered when the market conditions meet the criteria specified in the study. Audio/visual/e-mail alerts can be enabled simultaneously. | Alert is a visual or/audio/e-mail notification triggered when the market conditions meet the criteria specified in the study. Audio/visual/e-mail alerts can be enabled simultaneously. | ||
<div | <div class="important">Alerts can only be triggered in studies containing [[Alert]] Triggering Conditions in their code. To learn how to add alerts to studies code refer to the [[:Category:PowerLanguage|PowerLanguage manual]].</div> | ||
A check for the alert triggering conditions is performed whenever one of the following events occurs: | A check for the alert triggering conditions is performed whenever one of the following events occurs: | ||
* Workspace is opened | * Workspace is opened. | ||
* Data series (symbol) is replaced with another data series (symbol) | * Data series (symbol) is replaced with another data series (symbol). | ||
* A bar is closed or a new tick is received | * A bar is closed or a new tick is received. | ||
== Enabling Alerts == | == Enabling Alerts == | ||
| Line 17: | Line 16: | ||
# Check the '''Enable Alerts''' check box to enable alerts; uncheck the box to disable the alerts. | # Check the '''Enable Alerts''' check box to enable alerts; uncheck the box to disable the alerts. | ||
<div | <div class="tip">To use these alert settings as the default for all indicators, check '''Use as Default''' check box.</div> | ||
== Alert Conditions Check == | == Alert Conditions Check == | ||
You can elect whether to check for Alert Triggering Conditions every time a new tick is received, or only at the close of each bar. | You can elect whether to check for Alert Triggering Conditions every time a new tick is received, or only at the close of each bar. | ||
Alert Conditions Check can be set from the '''Format Indicator''' window: | |||
# Open the '''Format Indicator''' window.<br><span>{{FormatIndicator}}</span> | # Open the '''Format Indicator''' window.<br><span>{{FormatIndicator}}</span> | ||
| Line 29: | Line 28: | ||
# In the '''Alert Conditions Check''' section click the '''On Bar Close''', '''Every Tick''' or the '''Once Per Bar''' radio button, to select the alert triggering conditions to be checked at the close of each bar only, every time a new tick is received or every time a new tick is received once per bar only, respectively. | # In the '''Alert Conditions Check''' section click the '''On Bar Close''', '''Every Tick''' or the '''Once Per Bar''' radio button, to select the alert triggering conditions to be checked at the close of each bar only, every time a new tick is received or every time a new tick is received once per bar only, respectively. | ||
<div | <div class="tip">To use these alert settings as the default for all indicators, check '''Use as Default''' check box.</div> | ||
== Audio Alerts == | == Audio Alerts == | ||
Alerts can be set from the '''Format Indicator''' window: | Alerts can be set from the '''Format Indicator''' window: | ||
| Line 44: | Line 36: | ||
# Open the '''Format Indicator''' window.<br><span>{{FormatIndicator}}</span> | # Open the '''Format Indicator''' window.<br><span>{{FormatIndicator}}</span> | ||
# Select the '''Alerts''' tab. | # Select the '''Alerts''' tab. | ||
# | # Select the '''Audio Alert''' check box. | ||
# | # Select the .wav sound file in the '''File''' field. Ding.wav is selected by default. | ||
# Press the '''Play''' button to test the sound. | |||
<div | <div class="note">Make sure that the sound is enabled on your PC so that the '''Audio Alert''' function works properly.</div> | ||
<div class="tip">To use these alert settings as the default for all indicators, check '''Use as Default''' check box.</div> | |||
== Visual Alerts == | |||
== | |||
Alerts can be set from the '''Format Indicator''' window: | Alerts can be set from the '''Format Indicator''' window: | ||
| Line 56: | Line 49: | ||
# Open the '''Format Indicator''' window.<br><span>{{FormatIndicator}}</span> | # Open the '''Format Indicator''' window.<br><span>{{FormatIndicator}}</span> | ||
# Select the '''Alerts''' tab. | # Select the '''Alerts''' tab. | ||
# | # Select the '''Visual Alert''' check box. | ||
# | # In the '''Display Notify Window for''' drop-down list, select the period of time for the alert message to be displayed. | ||
<div | <div class="tip">To use these alert settings as the default for all indicators, check '''Use as Default''' check box.</div> | ||
== External Alerts == | |||
== | |||
Alerts | To enable External Alerts click the '''Add''' button and select one of the external alert configurations. | ||
# | To add a new external alert configuration: | ||
# Click the gear icon next to the '''Add''' button. | |||
# In the | # In the opened window configure the desired external alerts: | ||
# | #* [[Using_Alerts#E-mail_Alert|E-mail]] | ||
#* [[Slack WebHooks|Slack]] | |||
#* [[Telegram]] | |||
# Press '''OK'''. | |||
# Click the '''Add''' button and select the newly added alert configurations. | |||
<div | <div class="tip">To use these alert settings as the default for all new indicators, select '''Use as Default''' check box.</div> | ||
=== E-mail Alerts === | |||
== E-mail | |||
E-mail alerts can be sent when market conditions meet your defined criteria. | E-mail alerts can be sent when market conditions meet your defined criteria. | ||
| Line 83: | Line 75: | ||
This feature can be used to stay informed about market conditions while away from the computer. | This feature can be used to stay informed about market conditions while away from the computer. | ||
To | To configure an e-mail alert: | ||
# Go to '''File → Preferences → External Alerts''' tab. | |||
#Press the '''Add''' button. The '''E-mail Settings''' window will appear. | |||
# Click '''Show more''' top open the full settings. | |||
# Enter the email address of the sender. | |||
# Enter the email address of the recipient. To send the email to multiple recipients, separate each email address with a semi-colon.<div class="note">Verify that the email addresses in the Sender and Recipients sections are inserted correctly with no extra spaces before or after. </div> | |||
# Enter the '''SMTP Server Name or IP address''', and '''Port''' number into the textboxes. Please get this information from your email provider. | |||
#Check the SMTP Server authentication data checkbox if your SMTP server requires authentication to send emails. Enter the '''Username''' and '''Password'''. | |||
#Press the '''Test''' button to send a test email.<br>If the sending process has been successful a message will appear in the pop-up window<br>http://www.multicharts.com/img/wiki/Messages/AlertEmailOK.gif<br>If the sending process has been unsuccessful a message will appear in the pop-up window<br>http://www.multicharts.com/img/wiki/Messages/AlertEmailFailed.gif | |||
# Press '''OK''' to close the '''E-mail Settings''' window. | |||
< | <div class="example-no-title"> | ||
< | <div class="example-title">Example of e-mail alert message</div> | ||
< | 01.10.2026 17:48:50 (alert time and date) <br>Source: Bollinger Bands (study that triggered alert) <br>Symbol: ESZ26 (traded symbol name) <br>Resolution: 1 Tick Bar (resolution used) <br>Price: 1,157.50 (price value at the moment when defined conditions has been met) <br>Message: Price crossing over lower price band (message carrying information about the study condition that has been met).</div> | ||
< | <div class="note">Not all e-mail service providers are supported. For instance, Office365.com accounts are not supported. E-mail alerts configuration should be tested prior to use.</div> | ||
< | |||
< | |||
< | |||
==== GMAIL E-mail Alert Settings==== | |||
=====Configuration 1===== | |||
*Gmail SMTP server address: smtp.gmail.com | |||
* Gmail SMTP user name: Your full Gmail address (e.g. example@gmail.com) | |||
* Gmail SMTP password: A 16-digit app password generated in your Google Account as per [https://support.google.com/accounts/answer/185833 the guide] | |||
* Gmail SMTP port: 465 | |||
* Gmail SMTP TLS/SSL required: yes (SSL) | |||
=====Configuration 2===== | |||
* Gmail SMTP server address: smtp.gmail.com | |||
* Gmail SMTP user name: Your full Gmail address (e.g. example@gmail.com) | |||
* Gmail SMTP password: A 16-digit app password generated in your Google Account as per [https://support.google.com/accounts/answer/185833 the guide] | |||
* Gmail SMTP port: 587 | |||
* Gmail SMTP TLS/SSL required: yes (TLS) | |||
<div class="important">Since “Less secure apps access” was disabled by Gmail, it is required to configure the “App Password” for your Gmail account and use it in MultiCharts Email Alert settings. Please find more info about configuring “Sign in with App Passwords” [https://support.google.com/accounts/answer/185833 here]. Follow the instructions to generate the app password and insert it in the '''Password''' field in the '''Authentication Data''' section.</div> | |||
=== | === Slack Alerts === | ||
To send alerts to Slack, it is required to connect using a WebHook URL. | |||
<div class="tip-no-title">To learn how, please see [[Slack WebHooks]].</div> | |||
=== | === Telegram Alerts === | ||
To send alerts to Telegram, it’s required to connect to the MultiCharts_Alerts bot using Telegram User ID. | |||
<div class="tip-no-title">To learn how, please see [[Telegram]].</div> | |||
==== | ==Using Alerts in Drawings== | ||
Drawings are intended to work with symbol data and they react to price changes. So alerts can be triggered only by the drawings applied to symbols. | |||
Drawings applied to indicators won’t give any alerts as long as indicators don't have prices, but only plots, so drawings can never cross a price and therefore no alerts will be triggered when drawings cross indicator plots. | |||
[[Category:Studies]] | [[Category:Studies|B]] | ||
Latest revision as of 17:46, 17 September 2024
Alert is a visual or/audio/e-mail notification triggered when the market conditions meet the criteria specified in the study. Audio/visual/e-mail alerts can be enabled simultaneously.
A check for the alert triggering conditions is performed whenever one of the following events occurs:
- Workspace is opened.
- Data series (symbol) is replaced with another data series (symbol).
- A bar is closed or a new tick is received.
Enabling Alerts
Alerts can be enabled from the Format Indicator window:
- Open the Format Indicator window.To open the Format Indicator window, position the mouse pointer over the indicator; double-click once the Pointer
 changes into a Hand
  .
.
The Format Indicator window can also be opened by one of the following methods:
- Position the mouse pointer over an indicator; once the Pointer changes into a Hand , right-click and then click Format Indicator Name
- Open the Format Objects window; in the Indicators tab, select an indicator and click the Format button. See Opening Format Objects Window.
Note: The Format Indicator window for the indicator being inserted will open automatically if the Format check box in the Insert Study window is checked. - Select the Alerts tab.
- Check the Enable Alerts check box to enable alerts; uncheck the box to disable the alerts.
Alert Conditions Check
You can elect whether to check for Alert Triggering Conditions every time a new tick is received, or only at the close of each bar.
Alert Conditions Check can be set from the Format Indicator window:
- Open the Format Indicator window.To open the Format Indicator window, position the mouse pointer over the indicator; double-click once the Pointer changes into a Hand .
The Format Indicator window can also be opened by one of the following methods:
- Position the mouse pointer over an indicator; once the Pointer changes into a Hand , right-click and then click Format Indicator Name
- Open the Format Objects window; in the Indicators tab, select an indicator and click the Format button. See Opening Format Objects Window.
Note: The Format Indicator window for the indicator being inserted will open automatically if the Format check box in the Insert Study window is checked. - Select the Alerts tab.
- In the Alert Conditions Check section click the On Bar Close, Every Tick or the Once Per Bar radio button, to select the alert triggering conditions to be checked at the close of each bar only, every time a new tick is received or every time a new tick is received once per bar only, respectively.
Audio Alerts
Alerts can be set from the Format Indicator window:
- Open the Format Indicator window.To open the Format Indicator window, position the mouse pointer over the indicator; double-click once the Pointer changes into a Hand .
The Format Indicator window can also be opened by one of the following methods:
- Position the mouse pointer over an indicator; once the Pointer changes into a Hand , right-click and then click Format Indicator Name
- Open the Format Objects window; in the Indicators tab, select an indicator and click the Format button. See Opening Format Objects Window.
Note: The Format Indicator window for the indicator being inserted will open automatically if the Format check box in the Insert Study window is checked. - Select the Alerts tab.
- Select the Audio Alert check box.
- Select the .wav sound file in the File field. Ding.wav is selected by default.
- Press the Play button to test the sound.
Visual Alerts
Alerts can be set from the Format Indicator window:
- Open the Format Indicator window.To open the Format Indicator window, position the mouse pointer over the indicator; double-click once the Pointer changes into a Hand .
The Format Indicator window can also be opened by one of the following methods:
- Position the mouse pointer over an indicator; once the Pointer changes into a Hand , right-click and then click Format Indicator Name
- Open the Format Objects window; in the Indicators tab, select an indicator and click the Format button. See Opening Format Objects Window.
Note: The Format Indicator window for the indicator being inserted will open automatically if the Format check box in the Insert Study window is checked. - Select the Alerts tab.
- Select the Visual Alert check box.
- In the Display Notify Window for drop-down list, select the period of time for the alert message to be displayed.
External Alerts
To enable External Alerts click the Add button and select one of the external alert configurations.
To add a new external alert configuration:
- Click the gear icon next to the Add button.
- In the opened window configure the desired external alerts:
- Press OK.
- Click the Add button and select the newly added alert configurations.
E-mail Alerts
E-mail alerts can be sent when market conditions meet your defined criteria.
This feature can be used to stay informed about market conditions while away from the computer.
To configure an e-mail alert:
- Go to File → Preferences → External Alerts tab.
- Press the Add button. The E-mail Settings window will appear.
- Click Show more top open the full settings.
- Enter the email address of the sender.
- Enter the email address of the recipient. To send the email to multiple recipients, separate each email address with a semi-colon.Verify that the email addresses in the Sender and Recipients sections are inserted correctly with no extra spaces before or after.
- Enter the SMTP Server Name or IP address, and Port number into the textboxes. Please get this information from your email provider.
- Check the SMTP Server authentication data checkbox if your SMTP server requires authentication to send emails. Enter the Username and Password.
- Press the Test button to send a test email.
If the sending process has been successful a message will appear in the pop-up window
If the sending process has been unsuccessful a message will appear in the pop-up window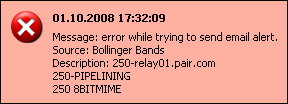
- Press OK to close the E-mail Settings window.
Source: Bollinger Bands (study that triggered alert)
Symbol: ESZ26 (traded symbol name)
Resolution: 1 Tick Bar (resolution used)
Price: 1,157.50 (price value at the moment when defined conditions has been met)
Message: Price crossing over lower price band (message carrying information about the study condition that has been met).
GMAIL E-mail Alert Settings
Configuration 1
- Gmail SMTP server address: smtp.gmail.com
- Gmail SMTP user name: Your full Gmail address (e.g. example@gmail.com)
- Gmail SMTP password: A 16-digit app password generated in your Google Account as per the guide
- Gmail SMTP port: 465
- Gmail SMTP TLS/SSL required: yes (SSL)
Configuration 2
- Gmail SMTP server address: smtp.gmail.com
- Gmail SMTP user name: Your full Gmail address (e.g. example@gmail.com)
- Gmail SMTP password: A 16-digit app password generated in your Google Account as per the guide
- Gmail SMTP port: 587
- Gmail SMTP TLS/SSL required: yes (TLS)
Slack Alerts
To send alerts to Slack, it is required to connect using a WebHook URL.
Telegram Alerts
To send alerts to Telegram, it’s required to connect to the MultiCharts_Alerts bot using Telegram User ID.
Using Alerts in Drawings
Drawings are intended to work with symbol data and they react to price changes. So alerts can be triggered only by the drawings applied to symbols.
Drawings applied to indicators won’t give any alerts as long as indicators don't have prices, but only plots, so drawings can never cross a price and therefore no alerts will be triggered when drawings cross indicator plots.