Quick Guide to Get Started
Contents
Get Started
Sign up at the Get Started page to download MultiCharts and get a free account that allows you to use the trading simulator and get a platform overview.
- Install and open MultiCharts.
- Sign in using the account information you received via email.
- Select our free simulator and start improving your trading techniques.
If you’d like to test out other tools and features, sign up for a trial period by clicking the Get Free Trial button at the Purchase page.
Set up Data Feed and Broker Profile
It is necessary to set up a data feed to have charts, and a broker profile should be configured for trading.
Data Feed Configuration
MultiCharts comes with Free Quotes (Yahoo end-of-day data), Bitfinex, Bittrex, and Poloniex (cryptocurrency feeds).
In order to get real-time and historical data for the other security types, you will need to get an account provided by any of the supported data sources. Each data feed supports certain security types
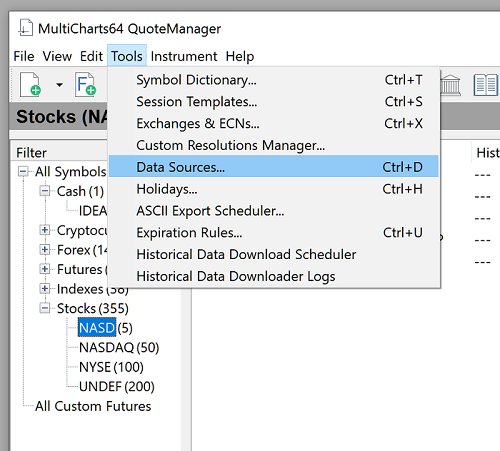
Set up your data feed in QuoteManager > Tools > Data Sources.
See how to configure the supported data sources here.
Broker Profile configuration
Most of the supported data vendors also provide brokerage services.
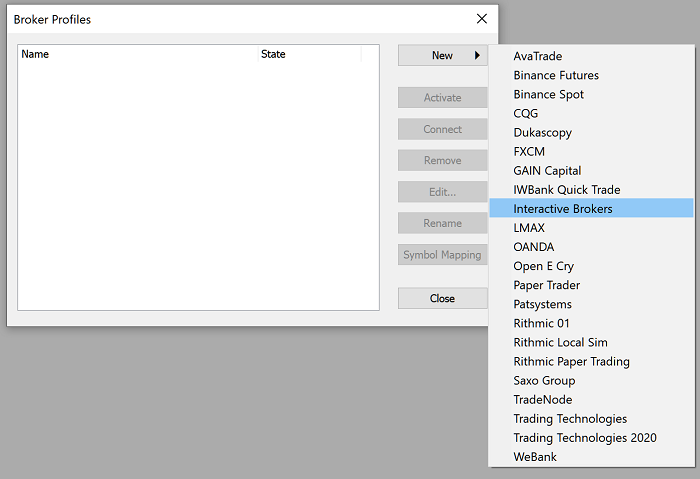
To add a new broker profile, in MultiCharts main menu go to File > Broker Profiles > Manage Broker Profiles. In the Broker Profiles window click New and select your broker.
The instructions on connecting different broker profiles can be found here.
Add the Symbols to Quote Manager
To create a new chart, you need to add the required symbol from the data source (available for most supported data feeds).
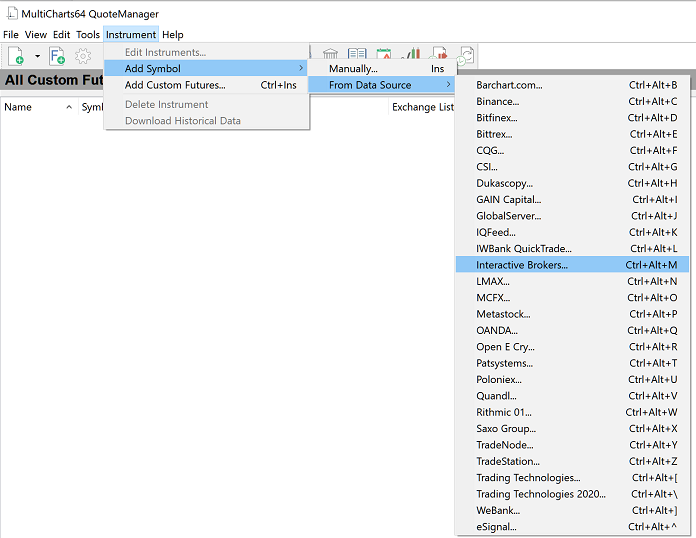
Add the symbols from your data feed in Quote Manager > Instrument > Add Symbol > From Data Source.
More detailed instructions on operating your symbol list can be found here.
Create the Charts
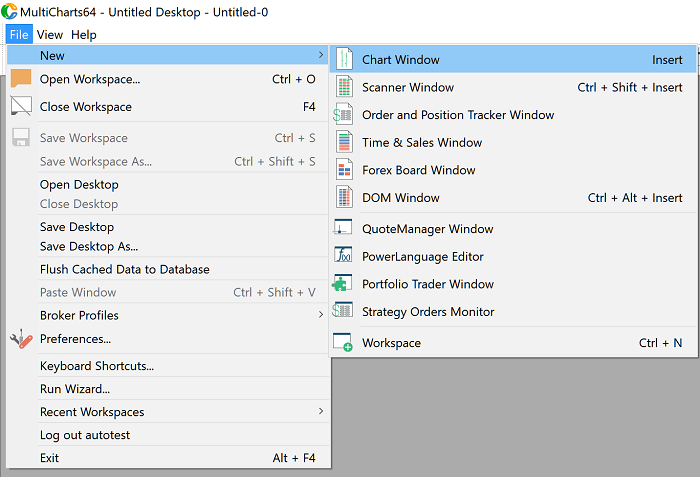
When all the required instruments are added, you can create charts via MultiCharts Main Menu > File > New > Chart Window.
Your MultiCharts is now set up to start:
— Backtesting,
— Optimizing,
— Manual trading,
— or Auto trading.
The most common data issues and recommendations how to troubleshoot them can be found in the Problems with Data in MultiCharts article.
Click here to be see MultiCharts FAQ.


